

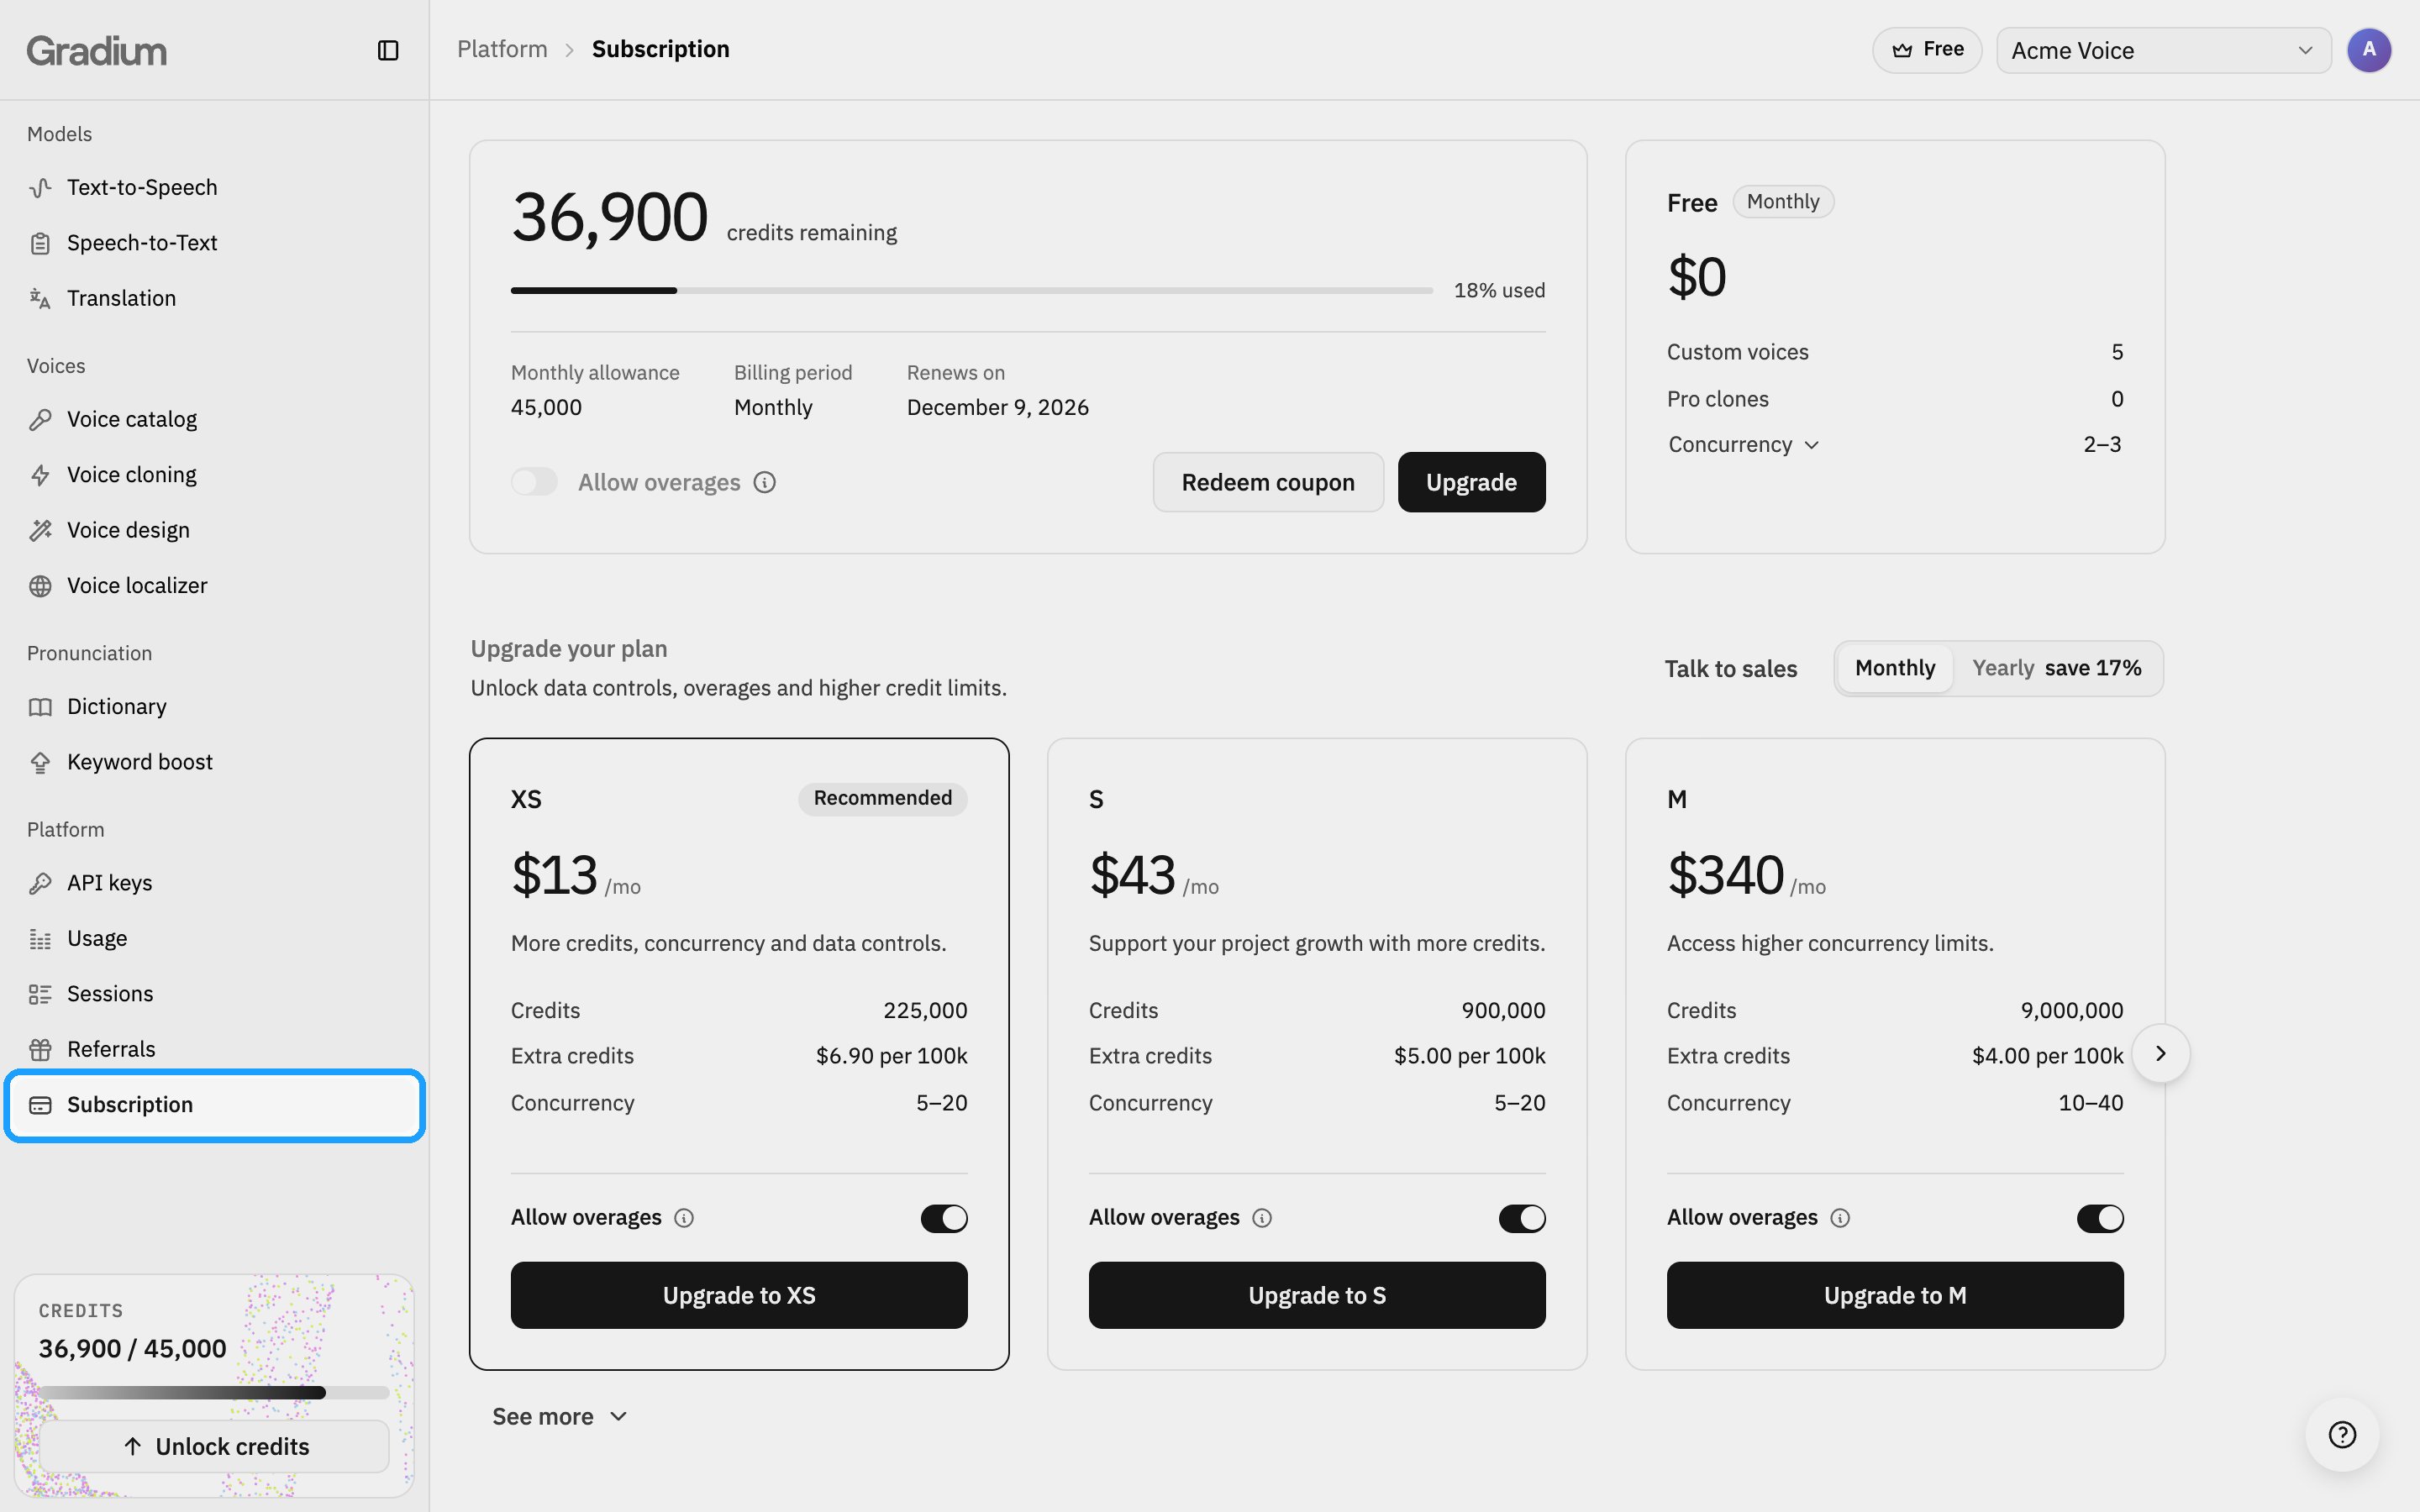
Upgrade
- Under Upgrade your plan, choose Monthly or Yearly.
- On the plan you want, check Allow overages. It is on by default where the plan supports it, and lets you keep using Gradium after your credits run out.
- Click Upgrade to [plan] and pay in Stripe.
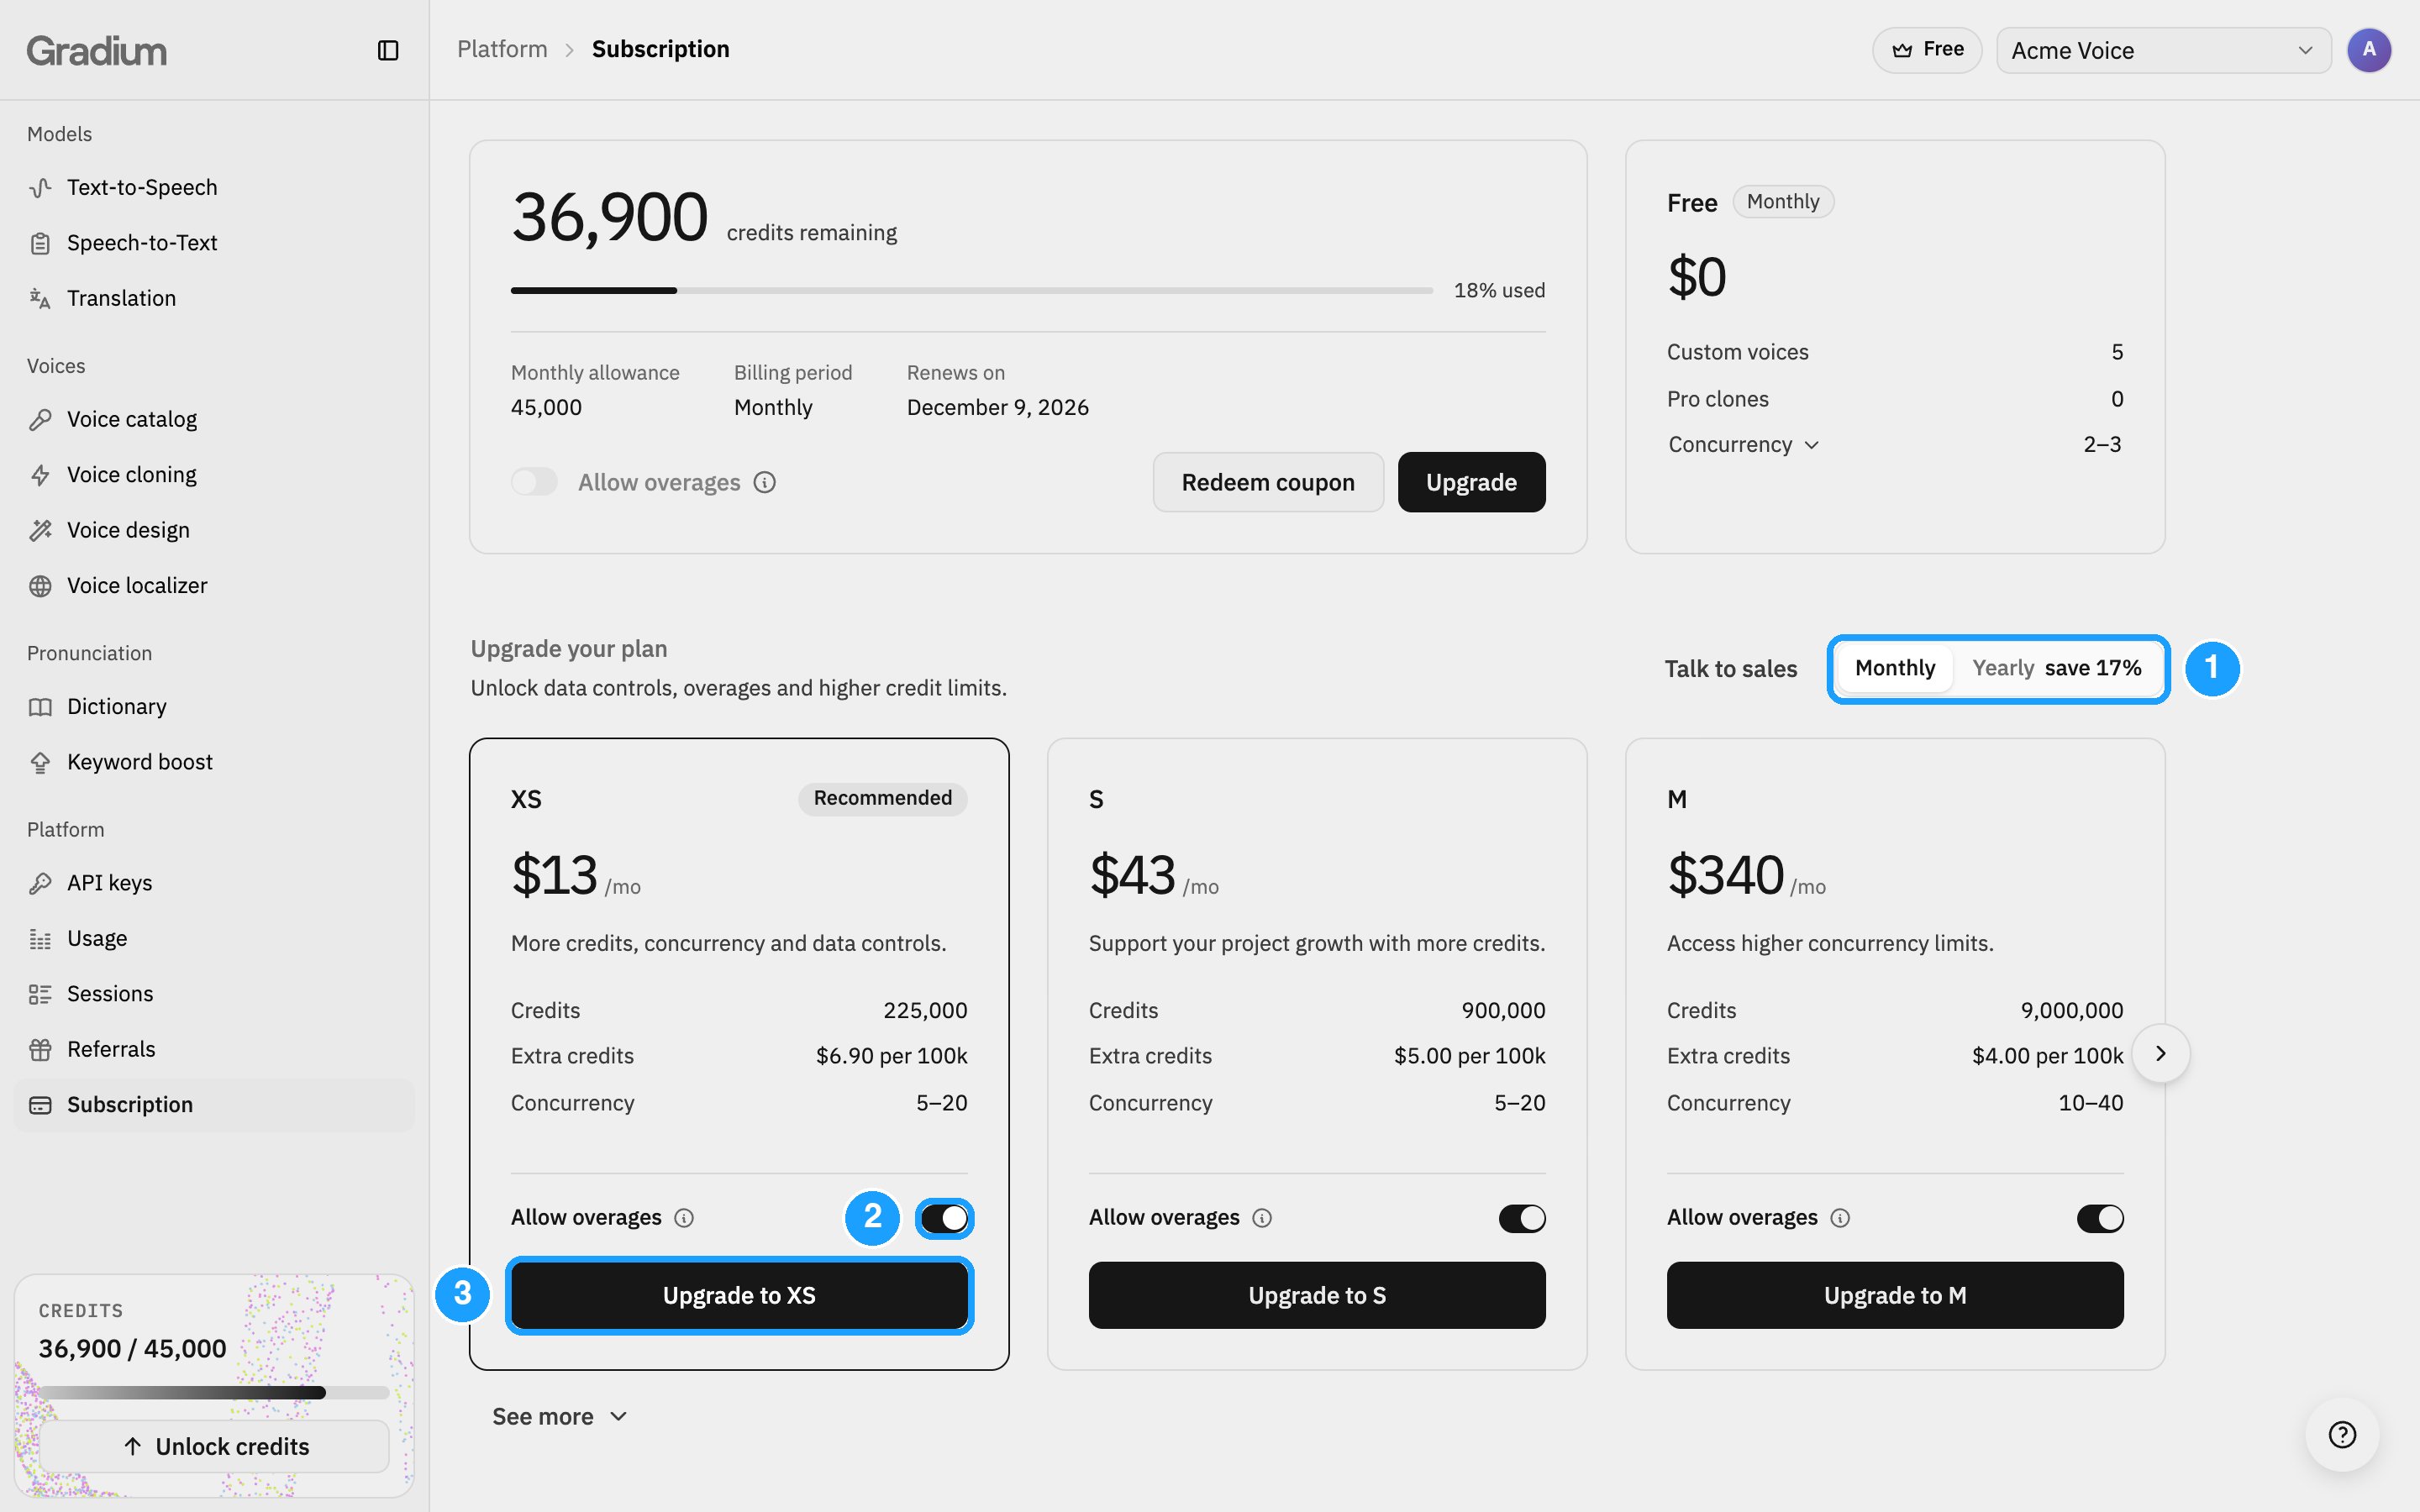
Downgrade
- On your current plan card, click Manage billing.
- Click Downgrade. With more than one smaller plan, pick the plan you want from the list that opens.
- Review what changes and confirm.
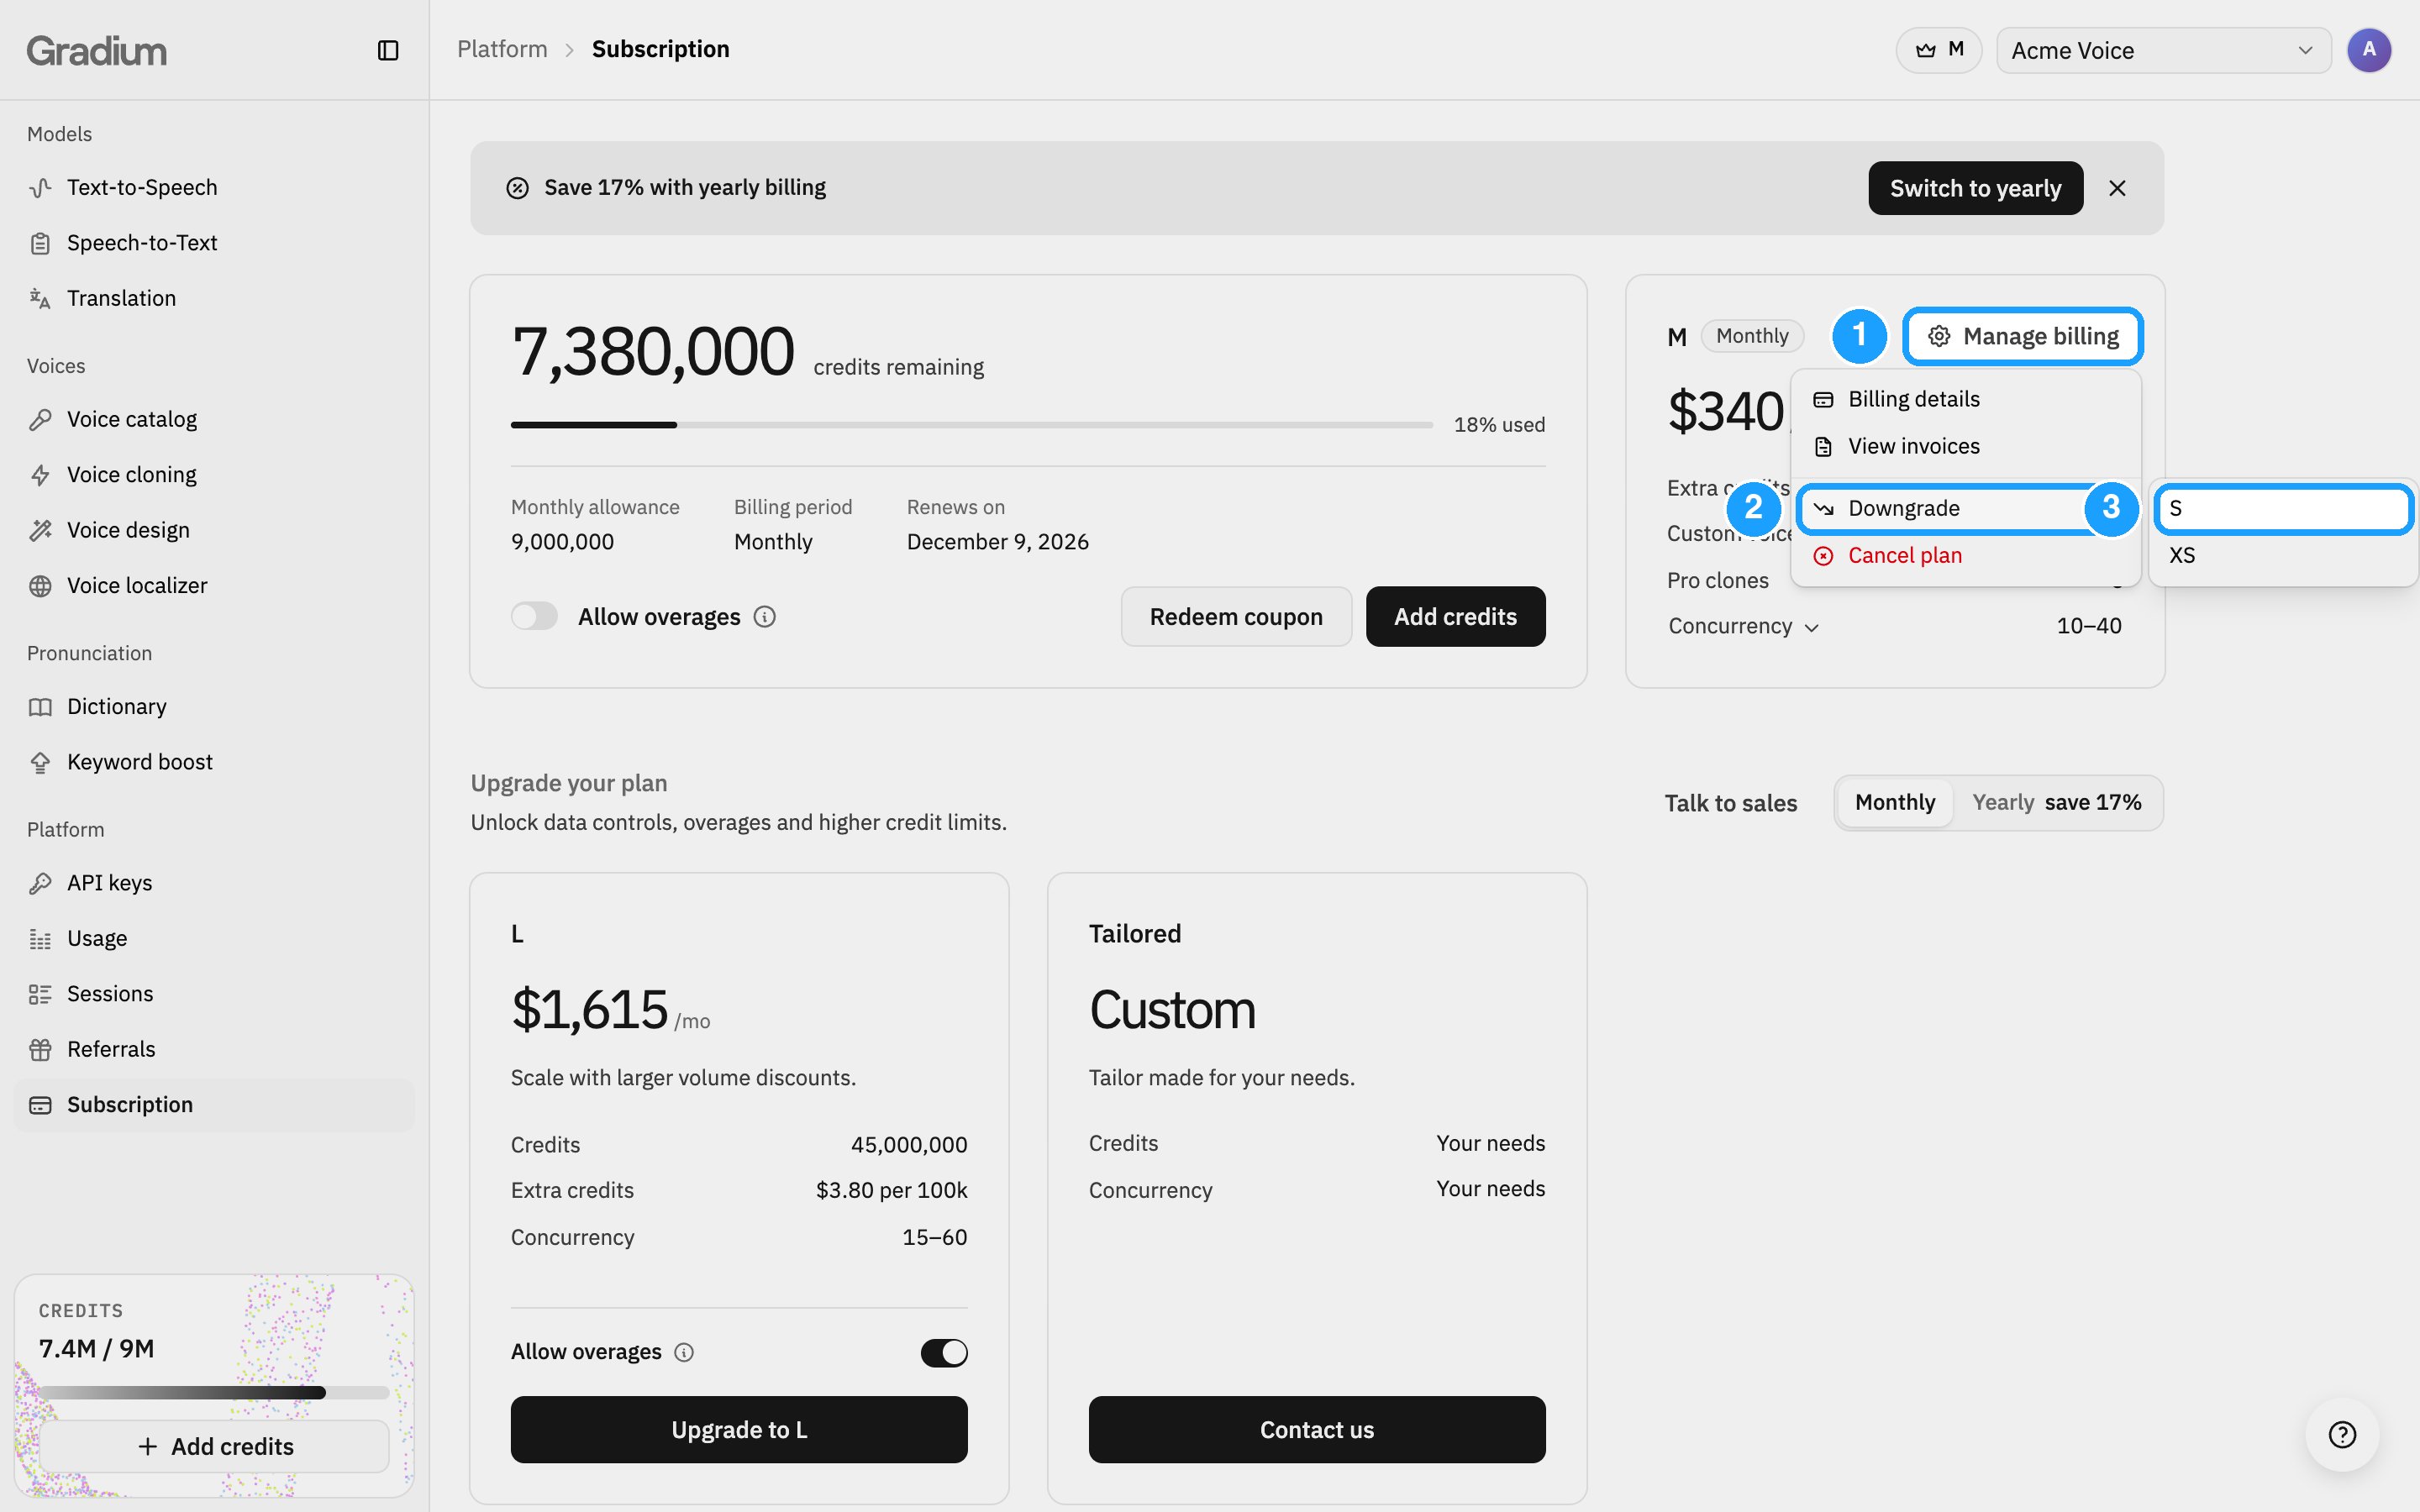
Cancel
- On your current plan card, click Manage billing.
- Click Cancel plan, then review what changes and confirm.
If your organization uses health-data hosting,
Cancel plan is greyed out, because health-data hosting needs a paid plan.
Ask to end health-data hosting from your organization settings first. You can
still move to a smaller paid plan.
Plan update schedule
Both are scheduled for the end of your current billing period. Until then you keep your plan and its credits. A banner at the top of the Subscription page shows the date and the plan you are moving to. To undo the change, click Keep [plan] in the banner.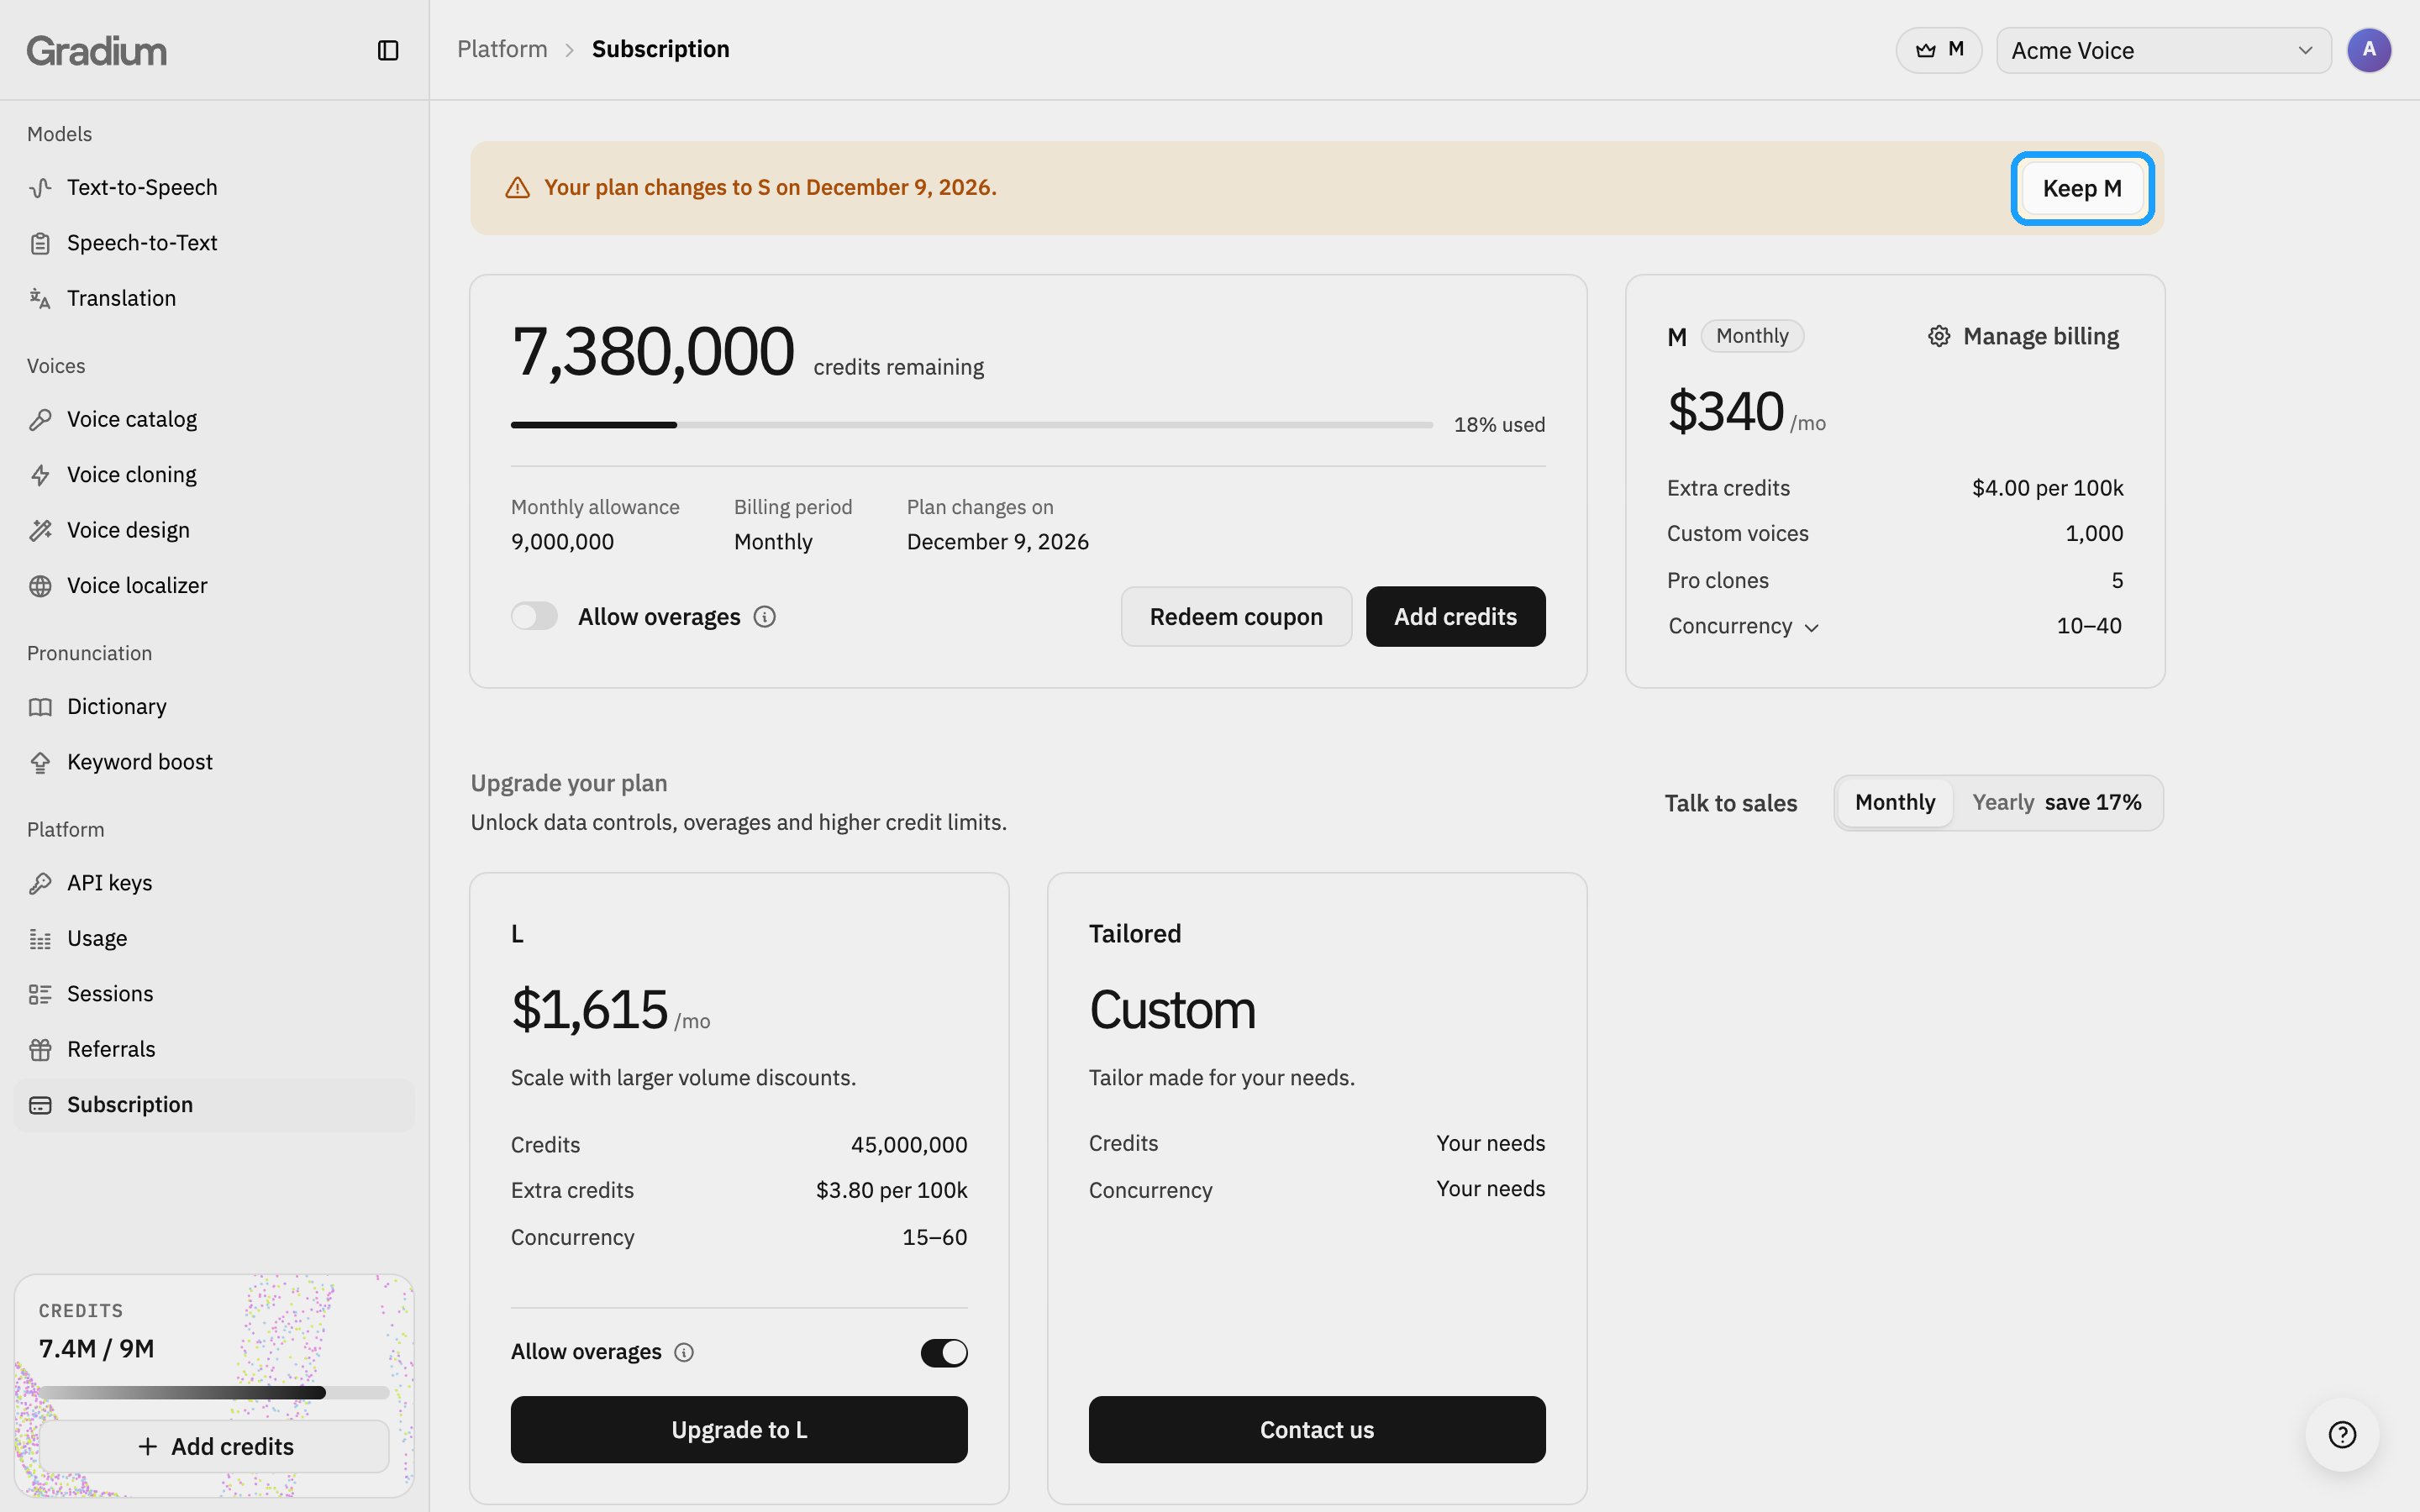
Update your billing details
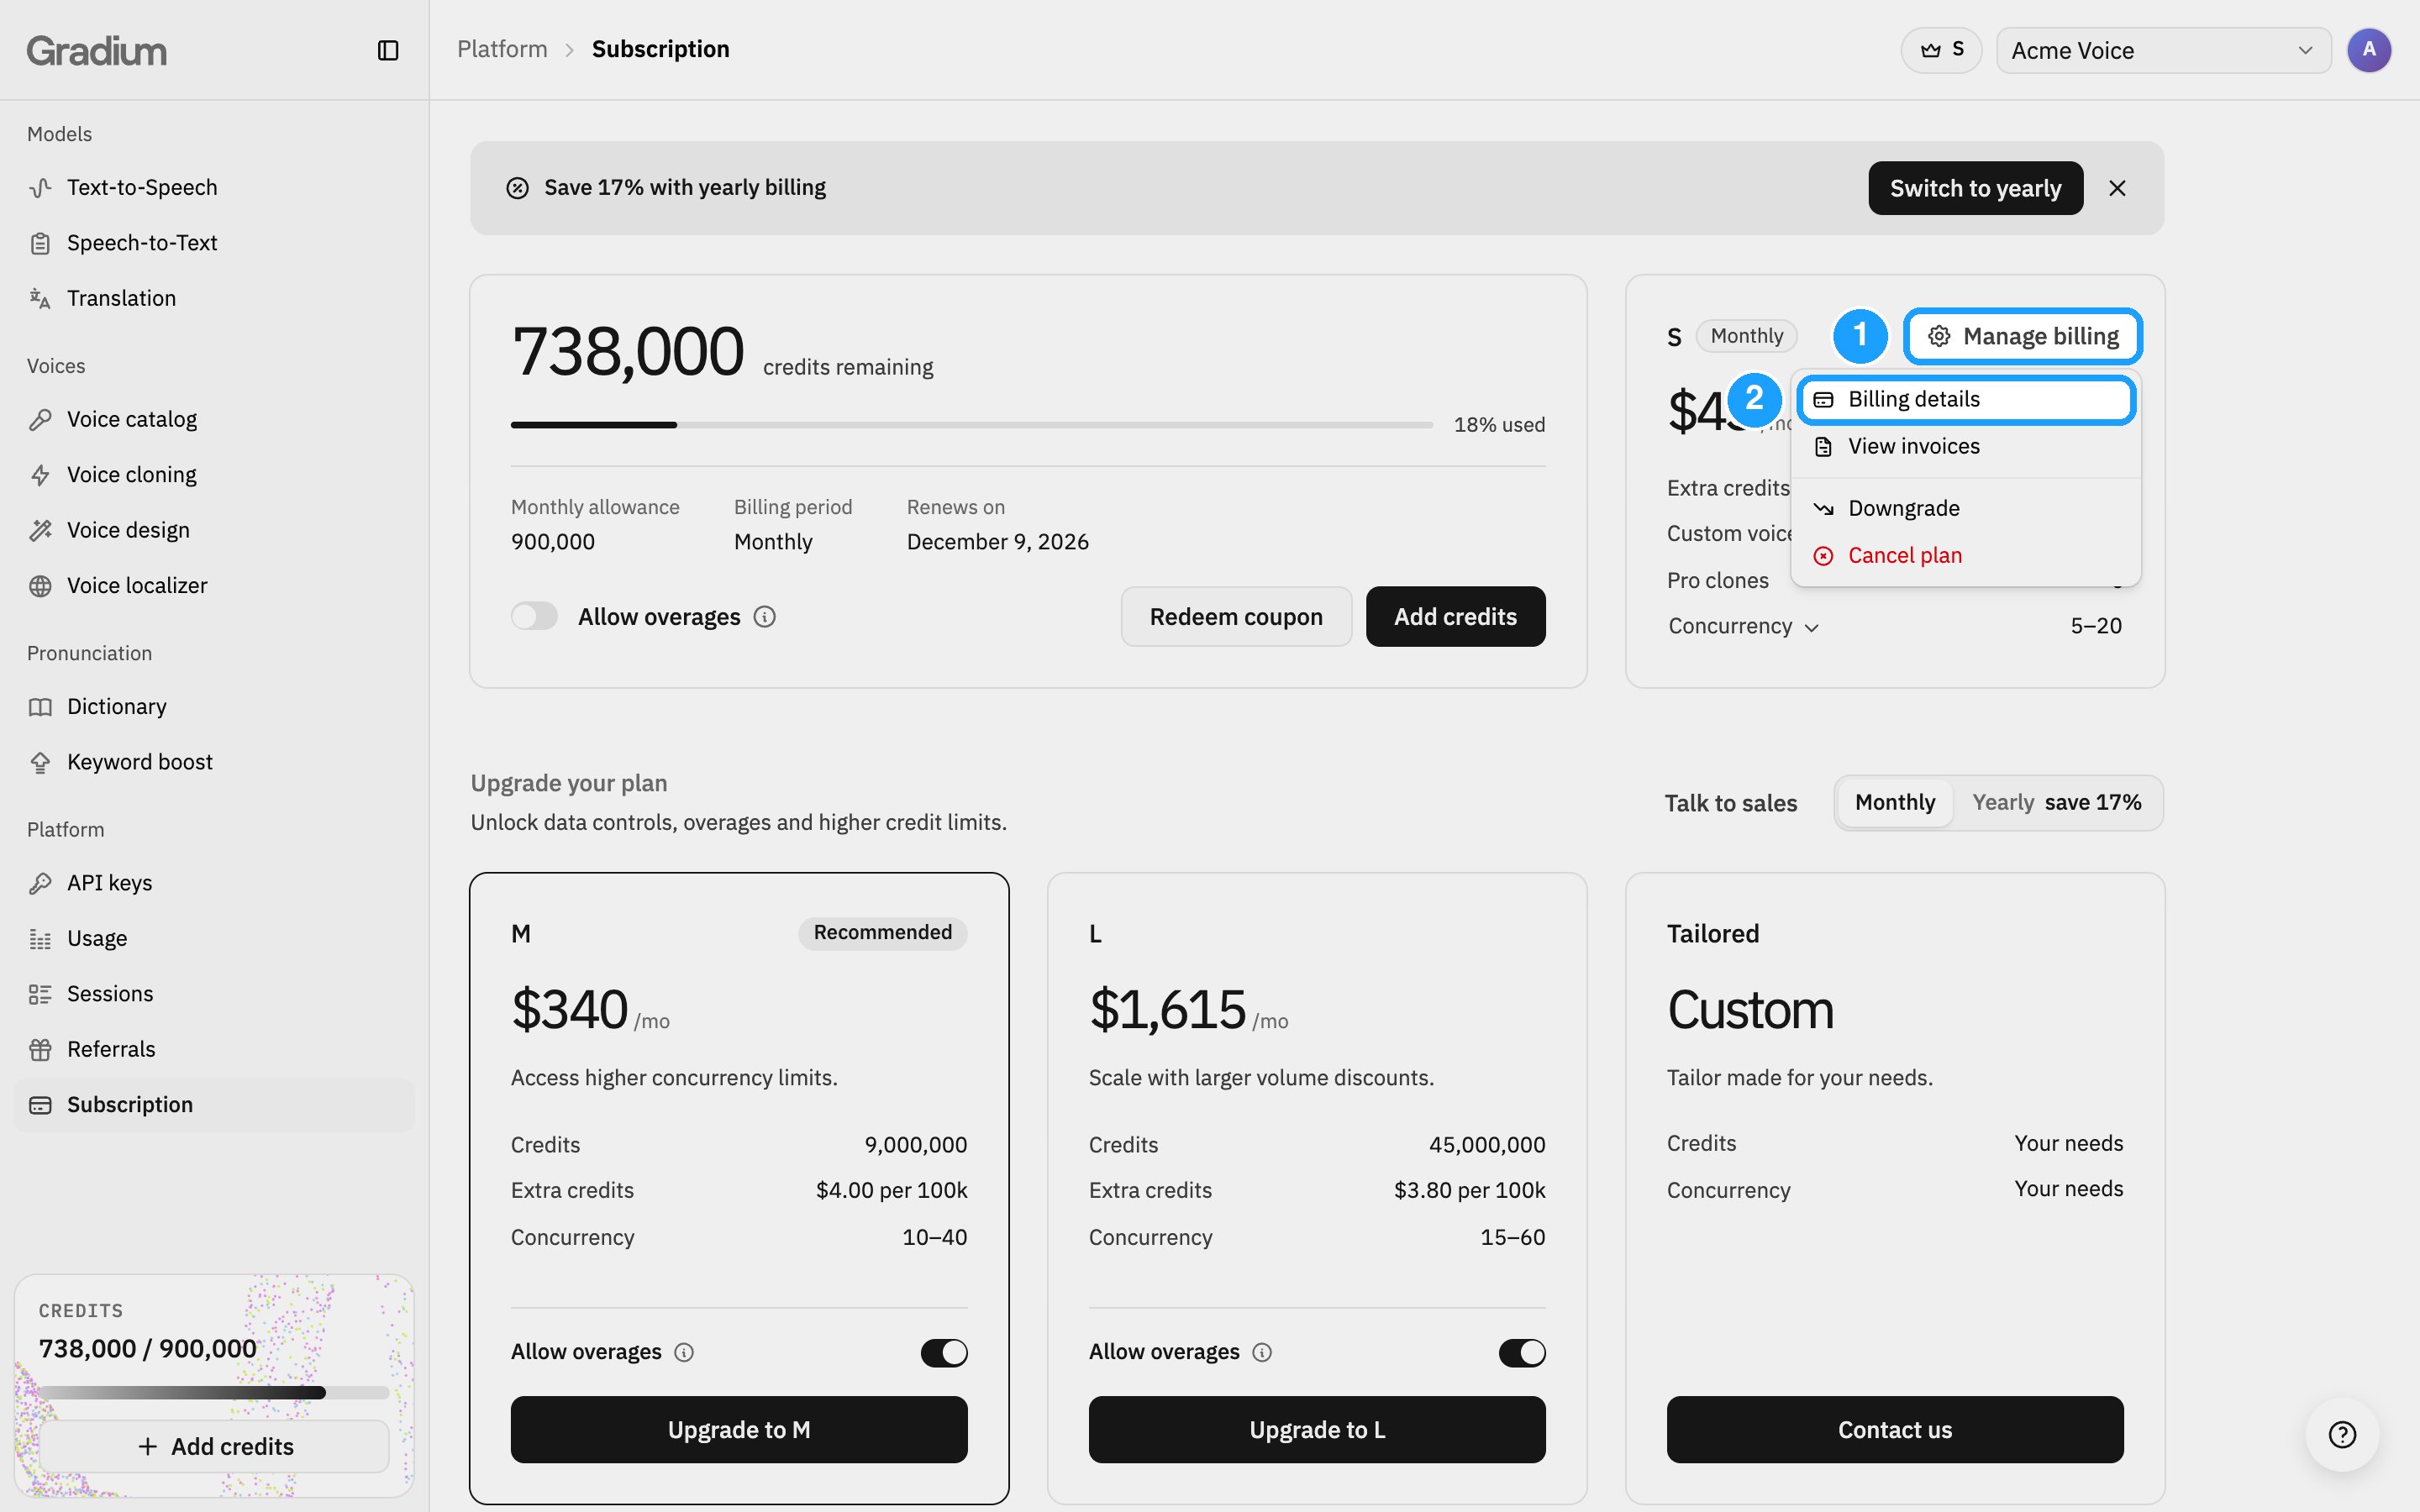
Your card and the details printed on your invoices (billing name, address and tax ID) are kept by Stripe, our payment provider.- On your current plan card, click Manage billing.
- Click Billing details. Studio opens Stripe’s billing page, where you can change your card and your billing details. Return to Gradium brings you back.
Add your VAT number
To show your VAT number on your invoices:- When you subscribe: on the Stripe payment page, tick I’m purchasing as a business, then fill in your business name, country and VAT number under Tax information.
- After you subscribed: follow Update your billing details and add your VAT number to your billing information. Without access to Studio, open the billing portal and sign in with your billing email.
Download your invoices
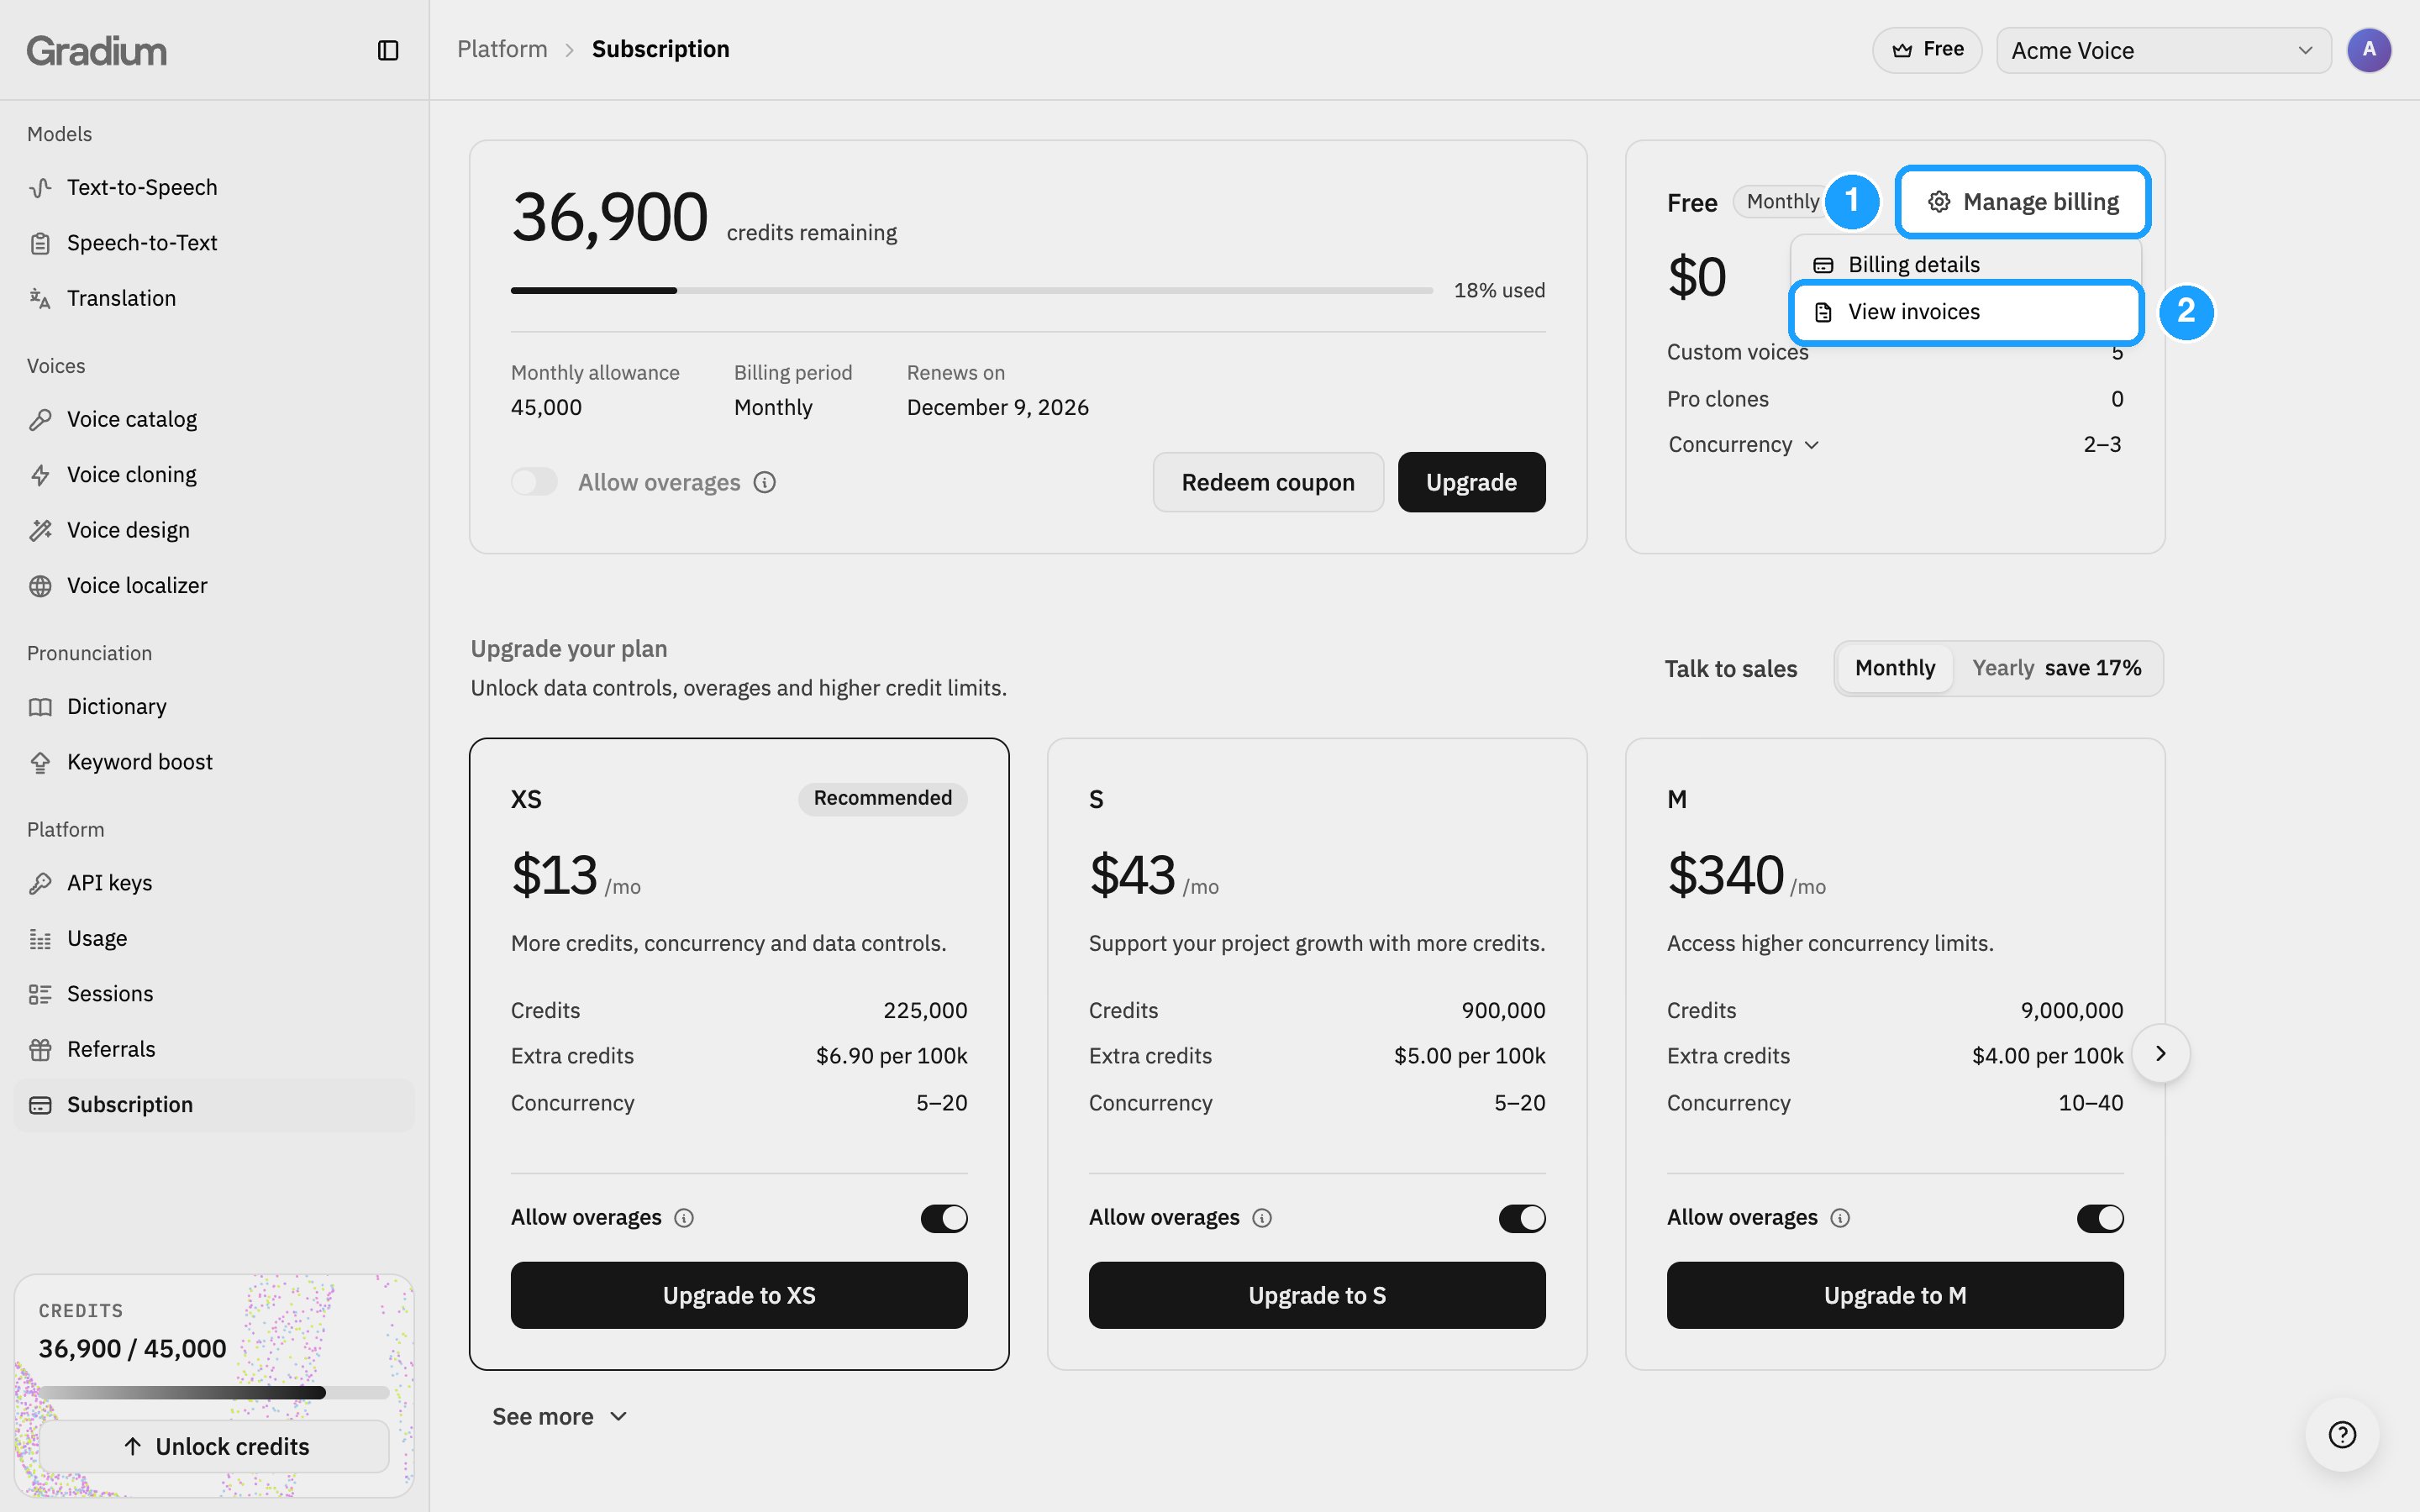
- On your current plan card, click Manage billing.
- Click View invoices.
- Download one invoice, the ones you tick, or all of them.
For a plan bought through
AWS Marketplace,
a custom plan, or a scheduled date that does not match your commitment, contact
support@gradium.ai.